Table of Contents
To start creating shaves in your Azure DevOps repositories via YakShaver, follow the steps below.
Note: You must have admin permissions for both your organization's Tenant and Azure DevOps account.
Step-by-Step Instructions
- Connect Azure DevOps to YakShaver
Navigate to YakShaver Integrations Settings and authorize with an Admin account. - Go to setting of the Azure DevOps Organization that you would like to add YakShaver to You can see the organizations you are in here: https://aex.dev.azure.com/me It should look like https://dev.azure.com/[yourOrg]/_settings
- Go to General | Users | Add Users, and add the following:
User/Service Principal: YakShaver.ai (ID:be9ecbe4-c377-43b8-a560-ab137326ebf2)
Access level: Basic
Add to projects: Include all projects YakShaver should access for creating Work Items
Azure DevOps Groups: Project Contributors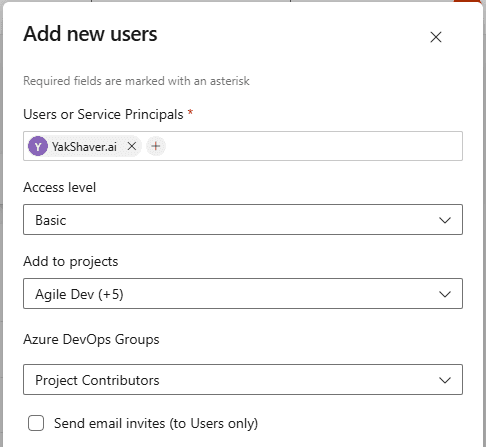
- Repeat for Each Organization
If you manage multiple Azure DevOps Organizations, repeat Step 2-3 for each one. - Sync Projects in YakShaver
Visit the Projects Settings page in YakShaver and sync your Azure DevOps projects. Your changes should now reflect in the portal.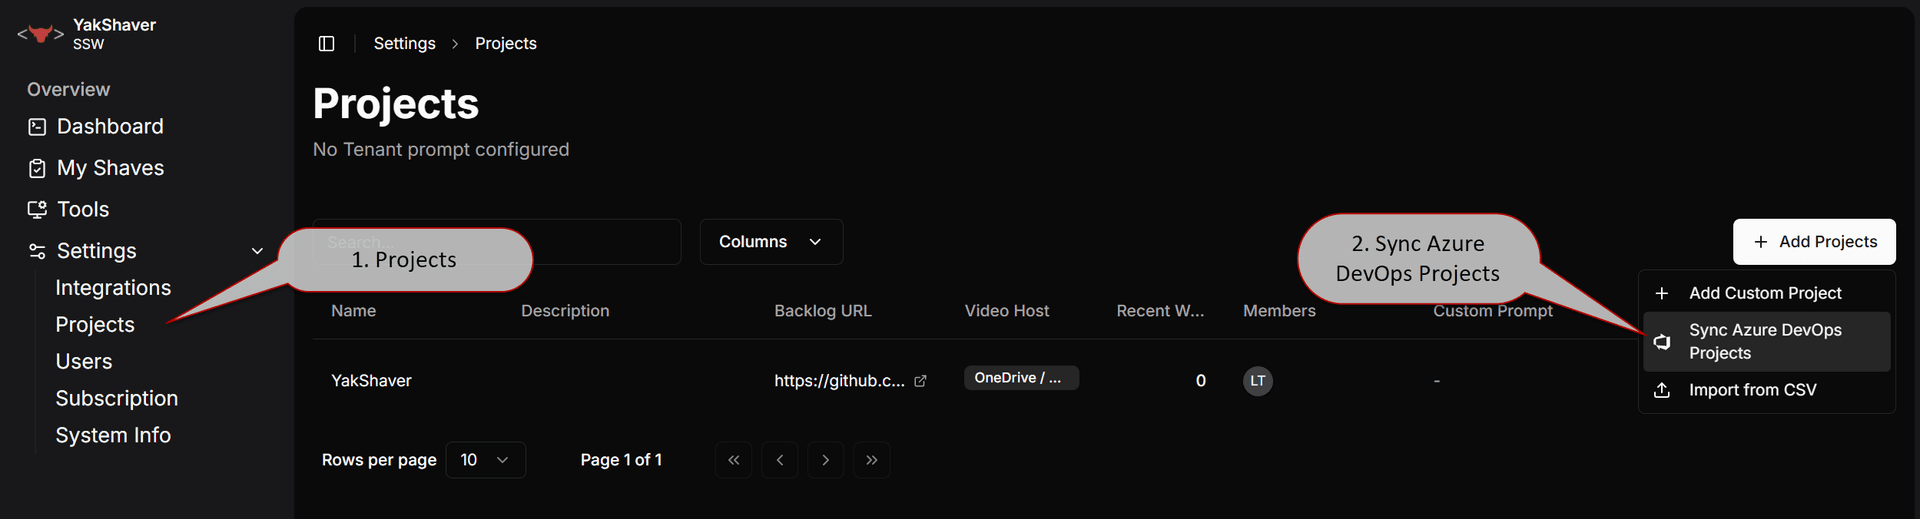
You're all set - YakShaver is now connected to your Azure DevOps projects.